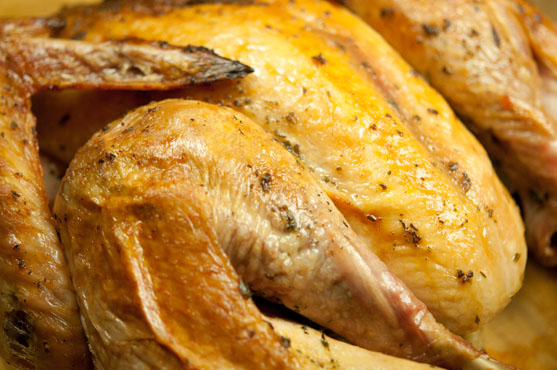
I was a twenty-something culinary ingénue living in San Francisco. My BFF- Kyle- in-laws and a few other guests were in town for Thanksgiving. I was absolutely tickled that I was going to make my turkey with a chef as talented as Kyle. I had my first fresh, expensive bird before me- a bird whose provenance was so esteemed that I couldn’t bear to treat it like just another bird. I wanted my guests to fall on the floor and start speaking in tongues when they tried their first bite.
I consulted my America’s Test Kitchen Cookbook, which extolled the virtues of spatchcocking the turkey. This involves cutting out the bird’s backbone and sort of butterflying the whole thing open. That seemed distinctive and sophisticated enough to make my statement of culinary prowess. I’d already brined the bird and had the herbed butter ready to go.
We sent everyone away for the afternoon, cranked up Erasure’s Greatest Hits, mixed a drink, and had a cooking fest. I filled Kyle in on my plan and handed him the knife. He’s the pro-chef, so he should do the tricky stuff, right? He raised an eyebrow. We hovered like Hannibal Lechter over that mass of bumpy rose-hued skin for about five minutes, each of us wondering if we could really desecrate the bird this way. It felt heretical. “You do it.” “No you should do it.” Back and forth we went. Kyle finally bailed out, decisively handing me the knife and a final lame excuse that I should do it because it was my bird.
I did it. We laughed hard while I did it because it was not a graceful process. And it was the best darned bird I’d ever had. I’ve never done a bird differently since.
Here’s the deal. The magic of spatchcocking is, foremost, that it puts the breast and leg meat on the same plane, allowing them to reach a done temperature almost simultaneously. A second cool effect is that, because you no longer have the cavity, the bird gets done faster. I’ve been doing chickens this way ever since. I’ve already written a long post about its virtues. [1]
You’re skeptical. I know.
• “But that won’t look so pretty coming out of the oven!” Do ya wanna eat it or frame it? And its not ugly, just different.
• “But then I can’t stuff the bird!” You know better than to stuff the damned bird. I don’t think I need to remind you that it forces you to overcook the breast meat in order to get the stuffing to a safe temperature. The only reason to stuff is bird is nostalgia.
• “But that sounds kind of scary.” Well, it is the first time. But so is flying in a single prop plane, birthing children, and showing up at a PTA meeting.
I’ve done all kinds of fancy stuff to turkey since then. What I’ve learned over time is that the key to a great bird is self-restraint and integrity.
• Start with a great bird. Pasture-raised. Organic. No solutions, antibiotics or hormones. Heritage breed. Pick some combination of those qualities and buy the best you can reasonably afford. And if you can’t afford a great bird, ignore the next piece of advice.
• A turkey should taste like turkey. Turkey tastes delicious. No getting all fancy-schmancy with rubbing butter under the skin with all manner of herbs and spices and aromatics. No brine flavored with spices or broth or anything goofy like that.
• Don’t rub anything under the skin. Detaching the skin from the breast meat leads to drier meat and skin. Keeping them together helps the fatty layer under the skin to baste the meat, resulting in moist flavorful meat and crispy, melt-in-your-mouth skin.
• Don’t roast a turkey on a rack. It allows too much evaporation of juices, setting you up for sorry, burned drippings.
• Don’t baste it. Contrary to conventional wisdom, this does not add flavor. Everything you baste it with just runs right off into the pan. I suspect that basters are in their very natures helicopter moms who love to hover and fuss. Everytime you open up the oven to baste the bird, the oven temperature drops dramatically, compromising the cooking of the bird and the even, crispiness of the skin.
Its likely that the lack of specific ingredient measurements is going to piss you off. But you can do this. Ready Prep Go! isn’t about recipes. Its about teaching you how to cook like a grown-up. Read the directions through before you get started and learn to trust yourself. It might not turn out perfect, but you’ll actually learn something about yourself and cooking and it will most likely be amazing and- worst case- be not bad.
Ingredients
For the meat
One whole turkey of any size
For the brine
Kosher salt
Water
Sugar
To baste
Some amount of a stick unsalted butter, melted
A 2-1 ratio of thyme to sage leaves, finely minced
Kosher salt
For the gravy
Reserved turkey backbone, giblets, and any other bones or non-fatty trimmings
1 onion (you decide how big based on your turkey size)
1-2 carrots, peeled and sliced into 1” rounds
1-2 stalks celery, sliced into 1/2” pieces
½ teaspoon peppercorns
5-10 stems fresh thyme
Flour
Turkey stock
Heavy cream and dry white wine, to finish
Instructions
Spa Day: birdie gets a salty soak
1. Two days before you will cook the bird, remove the neck and giblets and set them aside in the fridge.
2. Prepare your brine solution. Fill a large stockpot with water. Add enough kosher salt- stirring well between additions to dissolve completely- to create a taste that is reminiscent of sea water (2 gal water, 2 cups salt, one cup sugar for those needing precision). Add sugar, again stirring thoroughly, until the flavor of the sweetness just begins to come through the saltiness.
3. Wash a vessel for which you have a fitted lid that is large enough to accommodate your bird completely without excessive air space and with at least 2” space between the top of the bird and the top of the vessel. For a really big bird, I actually use an empty plastic sweater box that I’ve washed with soap and a dilute bleach solution and rinsed thoroughly. For a more petite bird, I’ll just use a large stockpot.
4. Place the bird in the brining vessel and fill it with brine until the bird is completely covered. If you need more brine, just mix salt and water in appropriate amounts (sea water taste test) and add to the mixture.
5. Place in a location that is less that 39-degrees for 18-24 hours. If you’re really lucky, you can use your back porch as a “walk out” fridge. When I lived in Chicago, I could place plastic wrap over the top of the vessel before lidding it to ensure a tight seal, bring it out by the back door and put a big piece of wood and a few bricks on it to deter any investigations by local wildlife. If you are not in such a convenient climate, you may need to pull a shelf or two out of your fridge to accommodate your birdie and its bath.
Dry the skin
1. Remove the bird from the water. Rinse with cold water. Pat dry with paper towels.
2. Place the bird in a roasting pan in your fridge and leave uncovered 8-12 hours. If you have a roasting rack, place it on the rack so that as much of the skin is exposed to air as possible. The purpose of this is to dry out the bird’s skin so that it will be able to brown and crisp up nicely. Expect some of the brining solution to seep out into the pan.
Spatchcock that bird
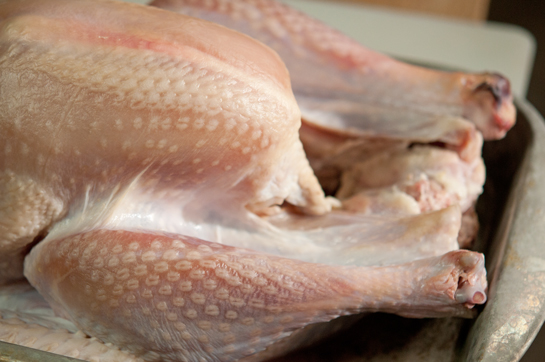
1. Place bird breast-side up on a cutting board with the cavity opening facing you. Now look down into that cavity and get a visual on that bird’s backbone. That’s what we’re going to hack at.
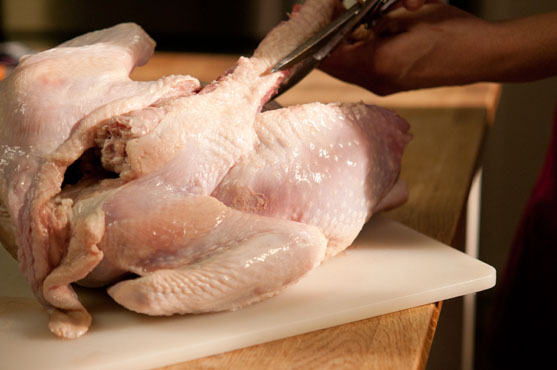
2. Flip your bird over. Grasping the tail protrusion for stability, use a very sharp, hefty chef’s knife to separate the backbone from the bones to which it is attached on either side. If you have very sharp kitchen shears or, better yet, poultry shears, those would be preferable to the knife. You’re running just along side the backbone. Move slowly and deliberately pushing the knife away from you and anyone else- except maybe your least favorite in-law.
3. The second side will be easier as you have more to hold on to and you can see better.
4. Reserve the backbone in the fridge with the giblets and neck.
5. Flip the bird breast-side up. Flatten out the bird by pressing hard to crack the top of the breastbone. Its like the clavicle section of the bird that we’re breaking here, but I don’t know what turkey clavicles are actually called. With my Xena Warrior Princess strength and knowledge of poultry anatomy, I can usually just do this by grasping the bones, cracking them, and then leaning hard into the top of the bird. You, however, may opt to whack it in its midline a few times with a rolling pin or your brother-in-law’s bald head.
Make the turkey stock
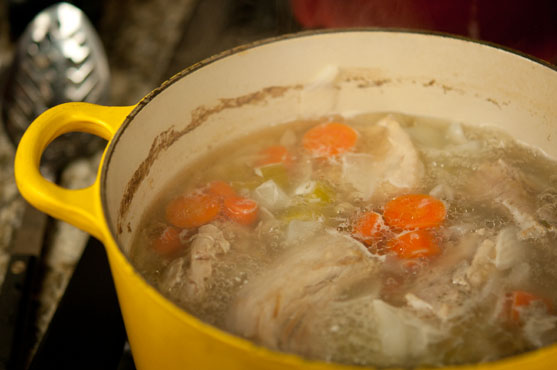
1. Place the turkey parts and giblets, celery, carrots, onions, bay leaf, thyme and peppercorns into a medium-sized pot. Add water to cover by about 1”.
2. Bring to a boil and then reduce to a low simmer. Simmer for the duration of the turkey’s cooking time. Add boiling water as necessary if it reduces to the point that the meats are no longer covered.
Roast that bird
1. Preheat oven to 400-degrees.
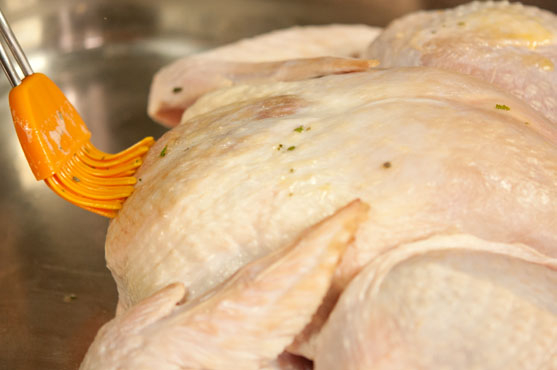
2. Melt the butter. Mix it with the herbs. Brush all of the butter over the surface of the turkey’s skin. Be sure to get all around the legs and wings.
3. Choose a roasting pan that is just slightly greater in diameter than the bird. This will prevent moisture loss from the bird’s drippings.
4. Place turkey in the roasting pan, breast-side up. Manipulate the legs so that the bird’s “knees” are touching each other.
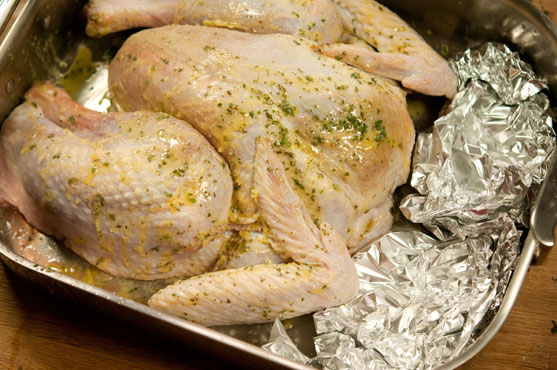 [6]
[6]I didn't have just the right sized pan for this medium-sized bird, so I placed it in a larger pan. I crinkled up some aluminum foil and put it in the excess space. The foil is there to prevent evaporation from the drippings. Without the foil, I'd risk dehydrating and burning them.
5. Place bird in the oven. Roast until done (165-degrees for breast meat, 175 for legs). The 10-pound bird in the photos took about 3 hours. If the skin starts to get too brown, loosely place a sheet of aluminum foil over the bird.
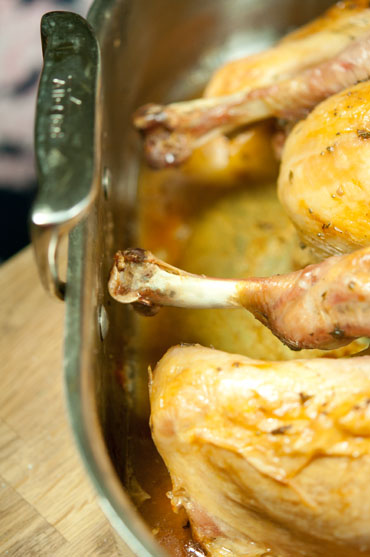 [7]
[7]One oft-overlooked indicator of doneness is the appearance of the drumsticks. Doneness is indicated when the skin recedes significantly up the legs. You still need to use a thermometer to check, but you needn't even bother checking until you see this happen.
Give that bird some time off while you make the gravy
1. Remove the bird from roasting pan onto a large carving board. Loosely tent with aluminum foil and allow it to rest for at least 30 minutes. DO NOT CARVE INTO THE BIRD FOR AT LEAST 30 MINUTES! GOT IT?
2. Get an assistant to hold a fine-mesh sieve over the roasting pan. Strain the hot stock into the roasting pan, discarding all of the solids.
3. Whisk the pan drippings into the stock. Whisk all over the bottom, loosening up and integrating all of the fond that might be clinging to the pan bottom. You’re using the residual heat from the pan and the hot stock to deglaze the pan. No need to put it over a burner.
4. Pour the liquid from the roasting pan into a steeply-sided, preferably transparent, bowl. Allow to settle for a few minutes.
5. Using a shallow ladle, skim the fat layer off the stock and into the pot in which you made the stock. Alternatively, you can use a turkey baster to suck it off the top.
6. Place the fat in the pot over medium-high heat and cook for a few minutes. If the fat begins to spatter, turn the heat down. You’re just heating the fat and evaporating any water that is mixed in with the fat.
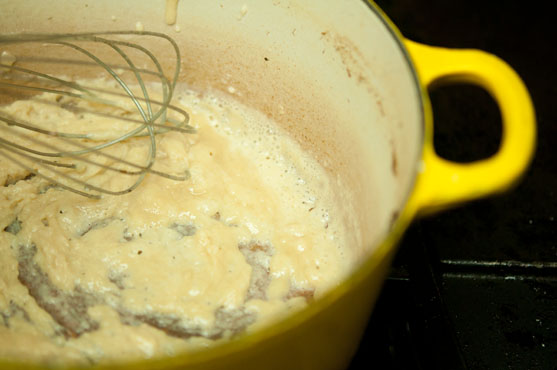
7. Add flour in 1 tablespoon additions, whisking with each addition. You’re trying to create a paste that is just thick enough so that when you whisk it, it sticks together and you can see the bottom of the pan for about 3 full seconds.
 [9]
[9]
8. Cook the fat/flour mixture (called “roux,” which is pronounced “roo”) until it goes from smelling like homemade play-doh to smelling toasty and nutty, about 2-3 minutes.
9. Add the stock, whisk to combine and cook until thickened, just a few minutes.
10. Add some dry white wine. You just want the tickle of acidity on your tongue.
11. Add some freshly ground black pepper. There should be plenty of salt from the drippings but adjust as necessary.
12. Finish with a touch of heavy cream. This softens and rounds out the flavors. Add a bit and taste until you get a flavor you like.
